How to Properly Configure Power Options for USB Devices
Disable USB Selective Suspend From the Control Panel
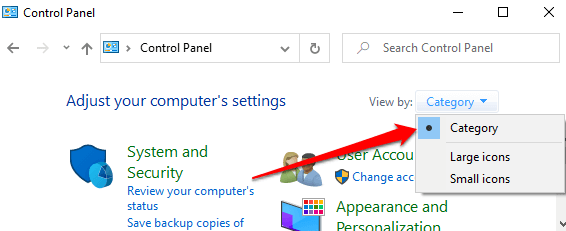
1. Launch the Windows Control Panel and set the “View by” option to Category.
3. Select the Change plan settings option next to your current power plan — Balanced or Power Saver or High Performance.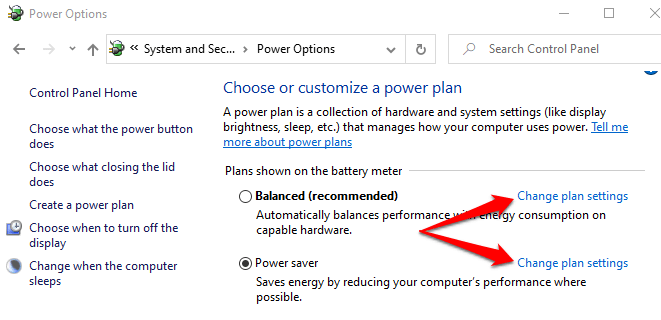
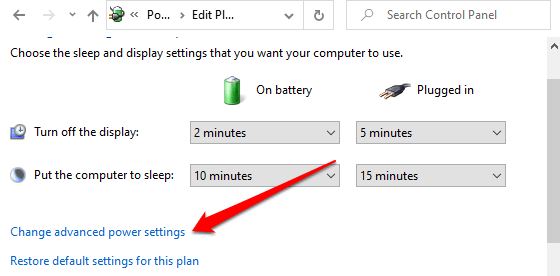
5. Expand the USB Settings section and then expand USB selective suspend setting.

6. Click the drop-down arrow next to the power plan you want to customize (“On battery” or “Plugged in”) and select Disabled.

You can also disable USB selective suspend by modifying the power management setting of the drivers powering your PC’s USB ports. Here’s what you need to do:
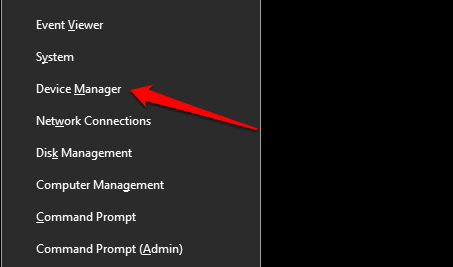
1. Right-click the Windows icon () and select Device Manager on the Quick Access menu.
2. Expand the Universal Serial Bus controllers section, right-click any of the “Generic USB Hub” or “USB Root Hub” drivers, and select Properties.
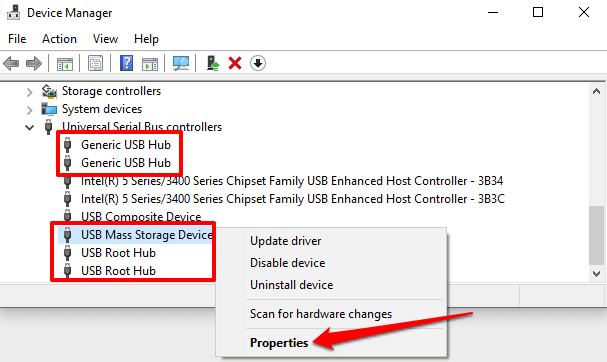
Note: The “USB Root Hub” manages your PC’s USB ports for compatibility with low and high-speed devices/connections. On the other hand, “Generic USB Hub” powers USB hub devices and accessories.
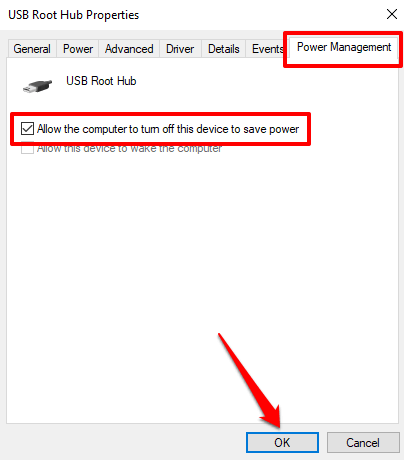
3. Go to the Power Management tab and un-check “Allow the computer to turn off this device to save power.”
Related Articles
Reporter Studio Pro User Guide
Updated 06/13/2024 Table of contents Contents Table of contents 1 1. Introduction 3 2. Installation 4 2.1 System Requirements 4 2.2 Installation 4 2.3 Running Deposition Recorder 4 3. Interface Guide 4 3.1 Start Up Window 5 3.2 Session Manager ...RS Pro Product Sheet
Recorder Studio Pro - MSVCP140.dll Error
Problem: When trying to start Reporter Studio Pro, I receive the following error. RSProLauncher.exe - System Error The code execution cannot proceed because MSVCP140.dll was not found. Reinstalling the program may fix this problem. Solution: You may ...Hybrid Recording Quick Guide for Remote Proceedings
The Hybrid recording method can be used for: Any remote recording session on any video conferencing platform Any remote recording session on any teleconferencing platform In person for a quick capture using either A USB conference phone A mixed ...RS Pro Crashes using the Jabra USB Conference Phone
Using the Jabra USB Conference phone as your input and output in RS Pro can cause the recorder to crash and not connect. The solution is to separate out the mic and speaker of the Jabra by naming them differently. With the Jabra plugged into your ...